
The ceiling fan wobbled. Then the drywall cracked along a seam. The bag was still in the box, sitting on the garage floor, and the homeowner was already staring at a repair bill. He’d skipped straight to drilling without finding a joist. That moment, described by dozens of people on r/HomeGym every few months, is exactly what this article is designed to prevent.
Mounting a heavy bag in a garage is genuinely one of the more satisfying DIY projects you’ll do as a home boxer. But garages have their own structural quirks, overhead obstructions, and load math. Get it right and you have a training setup that outlasts the bag. Get it wrong and you get that fan story. Here’s the full process, done properly.

Does Your Garage Ceiling Structure Hold a Heavy Bag?
Before you buy a single bolt, you need to know what’s above your drywall or ceiling panel. Garages come in two main configurations: attached garages with a floor above (living space or storage room) and detached garages with an open rafter system and a roof directly overhead.
In a detached garage with exposed rafters, you’re in luck. Those rafters are structural. A standard 2×8 or 2×10 rafter in a typical residential build can support a static load well above what any boxing bag weighs, but that’s static. A heavy bag in use generates dynamic load, which means the force spikes as you punch. The rule of thumb used by most contractors is to treat the mounting point as if it needs to hold four to five times the bag’s stated weight, accounting for the swing and impact forces. The American Wood Council’s span tables and load guides, available at awc.org, give you the underlying structural data for common lumber sizes if you want to verify your specific rafter dimensions.
In an attached garage with drywall overhead, those are typically ceiling joists, not load-bearing rafters. They’re designed to hold the weight of the floor above, not a swinging point load. That changes how you need to mount. You’ll either need to add a cross-beam between two joists or use a purpose-built garage bag mount that distributes the load across multiple attachment points.
How do you find the joists without tearing open the ceiling? A magnetic stud finder works on drywall if there are metal fasteners (drywall screws) going into the joists. A standard electronic stud finder also works. Alternatively, measure from a wall: joists are typically spaced 16 or 24 inches on center. Knock on the ceiling; solid sound means wood behind it.
What Hardware Do You Need?
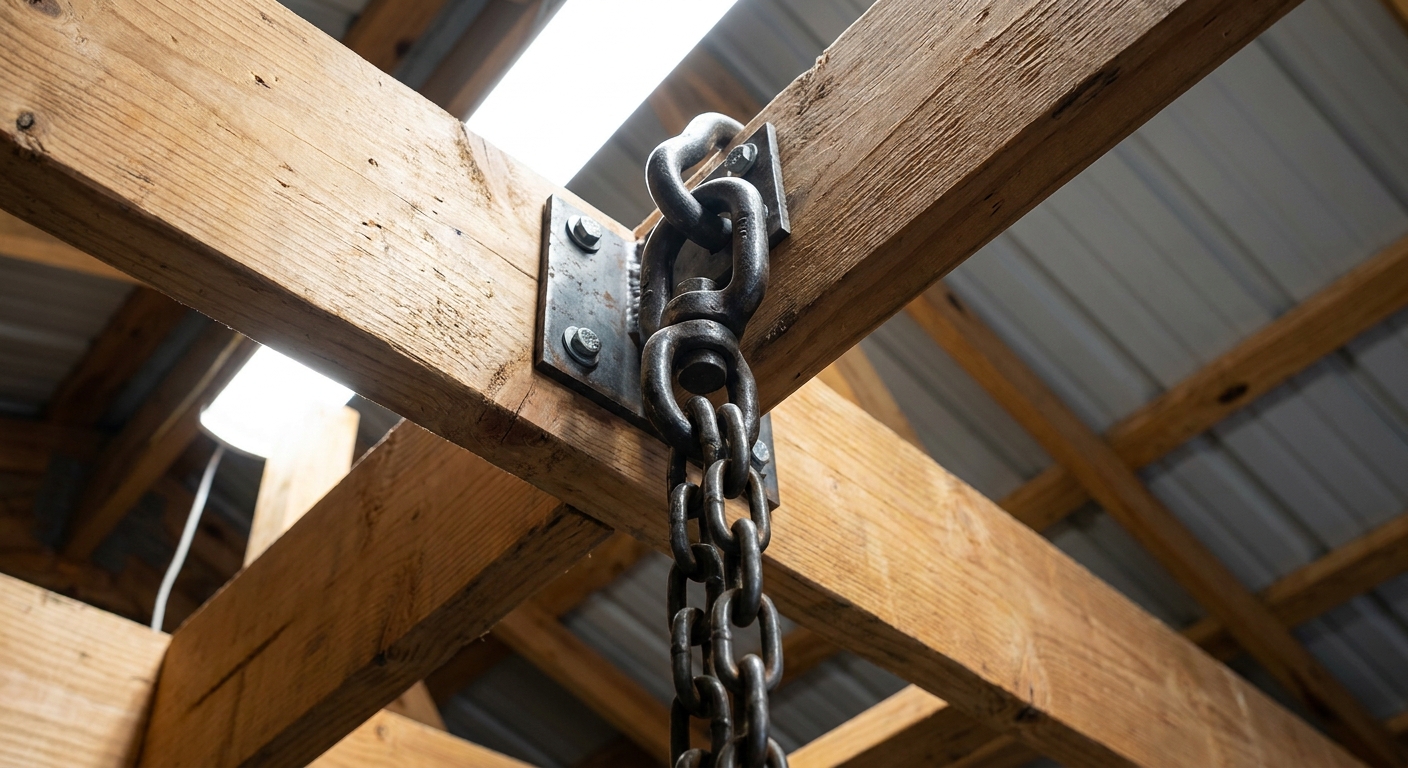
Go to any hardware forum thread about bag mounting and you’ll find someone who used a single lag screw and a carabiner from a camping kit. Don’t do that. The hardware matters, and it’s not expensive to do it right.
For a direct rafter or joist mount, you need:
- A 3/8-inch or 1/2-inch forged steel swivel. Not cast zinc, not plated stamped steel. Forged, rated for dynamic load. Brands like HYSST or generic rigging hardware from an industrial supplier will list working load limits (WLL). You want a WLL of at least 300lbs on a forged component, which gives plenty of safety margin above the dynamic forces.
- Two or three 3/8-inch structural lag screws, at least 4 inches long. They need to go through the drywall or ceiling panel and bite 2.5 to 3 inches deep into solid wood. Shorter than that and they’ll pull out under repeated load cycling.
- A backing plate or fender washers to spread the load around the lag screws. A 4×4-inch piece of 3/4-inch plywood sandwiched between the swivel mount and the ceiling surface works well and stops the screws from pulling through the drywall.
- A length of Grade 43 or Grade 70 chain in a gauge matched to your bag weight. Chain rated for 1,000lbs is cheap and overkill in the best possible way.
- S-hooks or quick links (steel, not zinc) for attaching chain to bag loops and swivel.
If you have a clear span between rafters and want to avoid drilling directly into them, a ceiling-mount beam kit, which is basically a heavy steel crossbar with mounting flanges, lets you bridge two rafters and attach the swivel at any point along the beam. Brands like Outslayer and Ringside sell these. They’re more expensive than lag screws and a swivel, but they’re also adjustable after the fact, which is useful if you decide to rearrange the garage later.
How Do You Handle a Concrete or Metal Ceiling?
Some garages, particularly newer builds or commercial-style detached structures, have steel bar joists, a steel deck, or exposed concrete overhead. The mounting approach changes completely here.
Concrete slab above: you need a concrete anchor, not lag screws. Wedge anchors or sleeve anchors in 3/8-inch diameter, rated for overhead loads, are the standard approach. Drill with a hammer drill, not a standard drill, using a masonry bit. Clean the hole before setting the anchor. Concrete anchors for overhead applications are rated differently than wall applications; check the manufacturer’s load table specifically for overhead installations.
Steel bar joists: your best option is a beam clamp, the kind used in construction rigging. These clamp onto the bottom flange of the joist without drilling. Rigging-grade beam clamps rated for overhead lifting are available from industrial suppliers. This is the cleanest solution for steel structure and doesn’t damage the joist at all.
Metal roof decking (corrugated steel panels with no structural joist below): don’t mount from this. The decking itself isn’t a structural element. You need to find the actual support members underneath it.
Should You Go With a Stand Instead of a Ceiling Mount?
Here’s where this gets honest. Ceiling mounts are not always the right call in a garage, and a freestanding bag stand might fit your situation better.
If your garage ceiling is finished drywall over ceiling joists, and you don’t want to cut through and add a beam, a stand eliminates all the overhead structural work. The trade-off is footprint: even a compact bag stand takes up a few feet of floor space in every direction, and in a one-car garage that’s already storing a car, bikes, or lawn equipment, that might not be viable.
If your garage is a true open-rafter structure and you have at least 8 feet of clearance, ceiling mount is almost always cleaner. The bag hangs closer to where it would in a gym, the swing path is uninhibited, and you recover that floor space entirely.
For pure bag work and solo rounds, a properly ceiling-mounted bag in a garage with exposed rafters is about as good as it gets for home training. If you want to compare the full cost and logistics of home training versus a gym membership, the breakdown at Boxing Gym Membership vs Home Training: Complete Cost Analysis goes through the numbers in detail.
Step-by-Step: The Actual Installation

You’ve confirmed your rafter is solid, you have the hardware, and the garage is cleared out enough to work. Here’s the sequence.
Mark the spot first. You want the bag hanging where you can circle it freely, ideally with at least 3 feet of clearance on every side. In a standard two-car garage, the center of the bay works. In a one-car garage, off-center is sometimes better to leave walking room along one wall.
Drill a pilot hole before running the lag screws. The pilot should be slightly smaller than the lag screw’s core diameter (not the outer thread diameter). This prevents the wood from splitting and makes driving the lag screw much cleaner. Use a hand ratchet or a low-torque impact driver. Don’t over-drive; you want the lag seated firmly against the backing plate, not compressing into the wood.
Install the swivel into the lag bolt or into the mounting plate, thread your chain through the bag’s D-ring, and bring it up to the swivel. Adjust chain length so the bag hangs at roughly chin height for the primary user. Too low and your punches arc downward; too high and your setup for body work gets awkward.
Before you throw your first punch, load test it. Grab the bag with both hands and pull down hard, then twist it laterally. Put your full body weight on it if you can. If the mount moves or creaks, stop and inspect every connection before using it further. A bag that falls during a hard round doesn’t just damage the floor; it can land on you.
What About Vibration, Noise, and the Walls Shaking?
A ceiling-mounted bag in a garage transfers vibration to the structure every time you hit it. In a detached garage, that usually means noise inside the garage and some vibration in the walls, neither of which is typically a problem unless you share a wall with a neighbor. In an attached garage, that vibration can travel through the framing and into the living space above.
There are a few ways to reduce this. A heavy bag spring, the kind that looks like a large coiled spring fitting between the chain and the swivel, absorbs a meaningful amount of the impact vibration before it reaches the mount. They’re inexpensive (under $30 for a quality spring) and noticeably effective. Rubber isolation pads between the swivel flange and the ceiling surface do less but also help.
If you’re mounting in an attached garage and someone sleeps above it, a spring is not optional. Also consider the time of your training sessions; concrete and steel structure carry sound more efficiently than you expect.
The Lonsdale boxing team used to run early morning sessions in a converted brick warehouse in East London, and part of the setup was a 4-inch rubber pad between every bag mount and the ceiling plate. The difference was noticeable in the upstairs office. The principle scales down to a garage.
Once You’re Set Up: First Training Session Checklist
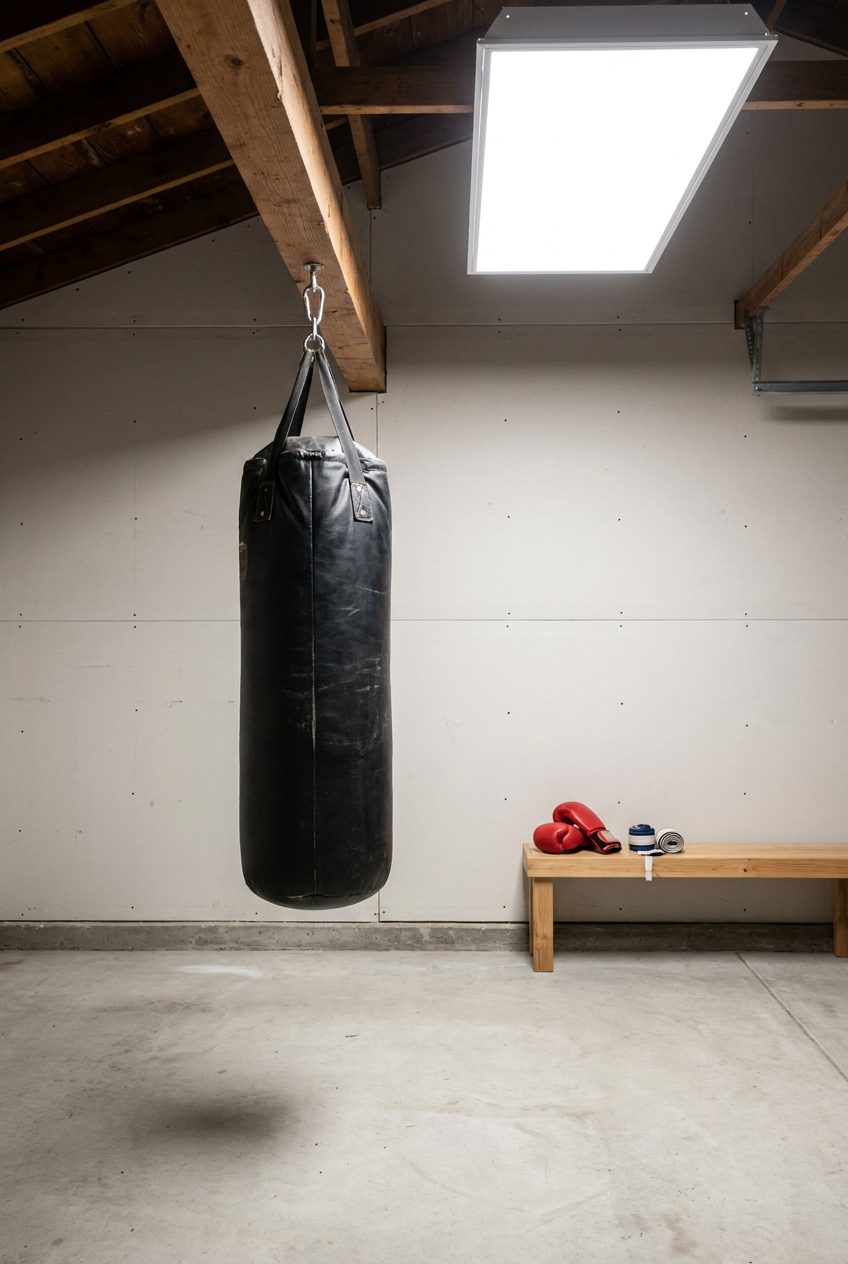
The bag is up. The chain length is right. Now run through this before you start throwing combinations.
Check every connection: swivel to mount, chain to swivel, chain to bag. Rattle each one with your hand. Nothing should be loose or rattling under its own weight.
Test the swing path: push the bag away from you and watch it return. It should swing in a straight line back toward you, not drift sideways or rotate. If it drifts, the chain is twisted or the swivel is binding. Unclip, untangle, and rehang.
Put the timer on before the first round. Working to structured rounds, rather than just swinging until you get tired, is the fastest way to improve. The free boxing round timer at heavybag.pro gives you configurable rounds, rest periods, and warning bells, which is all you need for a solid garage session. Download the Heavy Bag Pro app to take the full timer with you, or use it free in your browser if you have a phone mounted where you can see it.
Throw a few light jabs to feel how the bag responds. A fresh mount will sometimes shift slightly in the first few rounds as everything settles. Check the mount point after the first session; tighten anything that moved.
Once you know the mount is solid, get into real work. For programming ideas that match garage solo sessions, the coaching collection at Heavy Bag Workouts: Best Advice From 50+ Coaches is worth reading through. It’s a mix of approaches that translate directly to solo garage training without a partner or coach watching.
Maintenance: What You Should Check Every Few Months
A bag mount that was perfect on day one can develop problems over months of use. Lag screws loosen slightly as the wood cycles through seasonal humidity changes. Chain links wear at the contact points. Swivel bearings corrode in unheated garages that see temperature swings.
Every 3 months, or after any session where the bag felt different than usual: grab the chain near the mount and try to wiggle the mount plate. Inspect the lag screw heads for any gap between them and the backing plate. A lag that’s backed out even a few millimeters under load has lost a significant portion of its bite. Run a wrench over them to snug them back. Check the swivel for smooth rotation; if it’s grinding or stiff, a spray of penetrating lubricant (and eventual replacement) is the fix.
The chain loop that contacts the bag’s D-ring wears faster than the rest of the chain. Flip that end every 6 months. The chain will last much longer.
One last thing: if you ever sell the house or move, document what hardware is in the ceiling. A proper lag-and-swivel mount is a feature worth mentioning, but whoever moves in next should know it’s there and what it’s rated for.