
A 100 lb heavy bag hanging motionless puts 100 lb on your ceiling. That part is easy to plan for. The part almost nobody accounts for is what happens when you hit it, because a hard cross drives the peak load to somewhere between three and four times the static weight for a fraction of a second, and mounts do not fail at the average load. They fail at the peak.
That single fact decides everything else on this page. It explains why a hook rated to 200 lb is not a 200 lb bag hook, and why drywall anchors are useless whatever the packaging claims. People who end up with a hole in the ceiling almost always did the arithmetic on the wrong number.
Hanging a punching bag properly takes about an hour and around fifty dollars of hardware. Doing it badly takes a week to reveal itself and considerably longer to repair.
Find the joist before you decide anything else
Your ceiling is a sheet of drywall screwed to wooden joists, and the drywall is holding up nothing except itself. Everything you attach has to reach the wood behind it.
In most houses the joists run parallel to each other at 16 inch centers, though 24 inch spacing turns up in some builds and older properties can be irregular enough that you should measure rather than assume. They run in one direction across the room, usually the short direction, perpendicular to the longest wall. If you are working in a garage or an unfinished basement you can simply look up and see them, which makes the whole job considerably easier.
Everywhere else you need a stud finder. Run it across the ceiling perpendicular to the direction you believe the joists run. Mark both edges of the first solid object it detects rather than just the center, because the width of what you find tells you whether it is a joist or something you very much do not want to drill into. Joists read as a consistent band around 1.5 inches wide. Ductwork reads much wider than that, while a pipe or a cable reads narrower and less consistent.
Then confirm it. Measure 16 inches to either side and check for a neighbor, since two parallel objects at a standard spacing is far better evidence than one object on its own. If you want to be certain, drill a small pilot hole and feel for continuous resistance through the bit, which is what wood gives you and what a gap between joists does not.
The last thing worth checking is joist depth, and you can usually see this from a basement or an attic hatch. Anything 2×8 or deeper will take a home heavy bag without complaint, and 2×6 joists handle bags up to about 100 lb comfortably. Anything shallower, or the engineered I-joists common in houses built after roughly 2000, and you should spread the load across two joists with a mounting plate rather than putting everything into one member.
Never hang a bag from drywall alone, from a suspended or drop ceiling, from any expanding or toggle anchor regardless of its rating, from a ceiling fan electrical box, from exposed pipework, or from a joist you have located but not physically confirmed.
The four ways to hang a punching bag
Ceiling mount
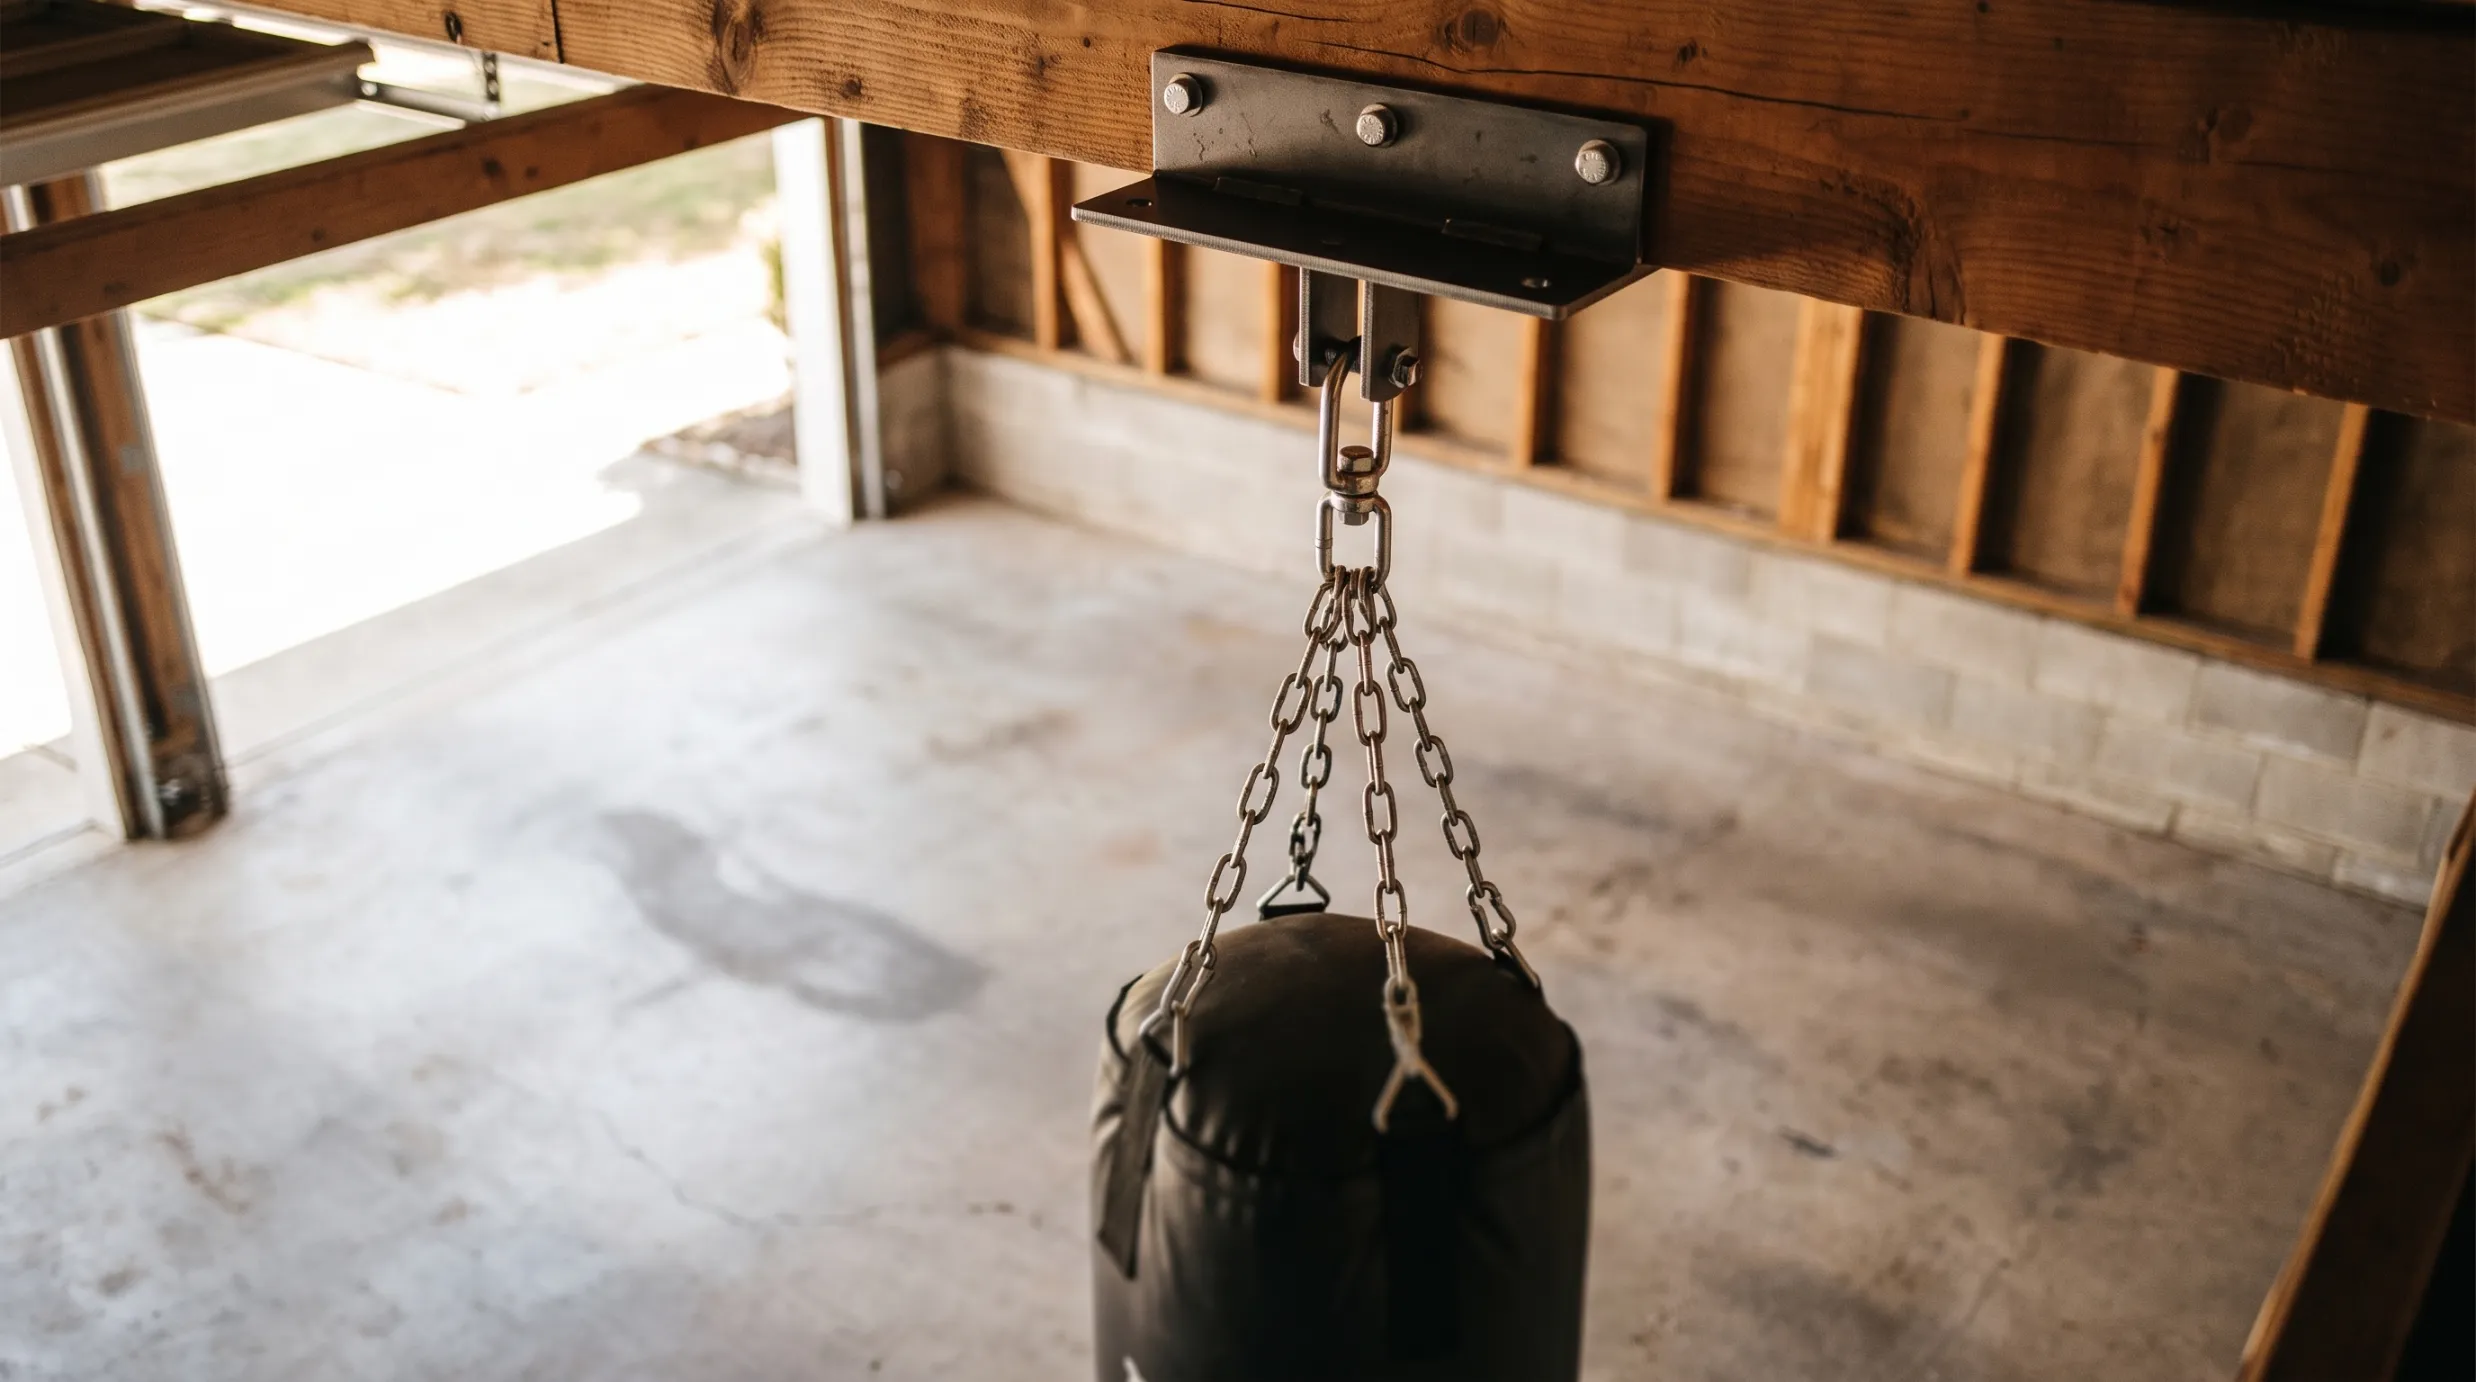
This is a steel plate bolted through the drywall into the joist, with a swivel or eye bolt hanging below it. This is the standard solution and the right one for most people.
Use lag bolts rather than screws, because a lag bolt has a coarse thread designed to hold in timber under sustained load and a wood screw does not. Three eighths of an inch diameter is the sensible minimum. The bolt also needs to be long enough that at least two inches bites into the joist after passing through half an inch of drywall, which in practice means three inch bolts as a floor and four inch if your drywall is thick. Drill pilot holes slightly narrower than the shank of the bolt, since driving a lag bolt into unprepared timber splits the wood along the grain and a split joist holds far less than an intact one.
Four bolts, one at each corner of the plate. If the plate is long enough to span two joists, use it that way, because two joists sharing the load is the strongest arrangement available to you without actually adding timber.
Beam clamp
If you have an exposed beam, a steel I-beam, or open joists in a garage or basement, a beam clamp is quicker than bolting and leaves nothing behind when you move.
The thing to check is the rating, and to check it against the dynamic load rather than the weight printed on the bag. Take the bag weight, multiply by four, and make sure the clamp is rated above that with room to spare. Something rated to 200 lb is realistically a 50 to 60 lb bag clamp once you have accounted for impact, which is not what most people assume when they read the box.
Wall bracket
This is a steel arm that bolts into wall studs and holds the bag away from the wall. This is the answer when the ceiling is unusable, and it is a compromise rather than an equal alternative.
Wall studs sit at 16 inch centers like joists, and a bracket needs to catch at least two of them, which is why brackets come with long backplates. The mechanical demand here is different from a ceiling mount, because the arm creates a lever and the load arrives as a combination of downward force and outward pull on the top fixings. Any bracket carrying the same bag as a ceiling plate is working harder for it, so buy the heavier one rather than the cheaper one.
The practical drawback is swing. The arm limits how far the bag can travel before it comes back toward the wall, and over time a bag that clips the wall will mark it and eventually damage it.

Free standing stand
No drilling at all. You get a steel frame with a weighted base, either a dedicated heavy bag stand or a combination unit with a speed bag platform on top.
Stands are the correct choice for renters, for anyone with a drop ceiling, and for anyone who expects to move within a couple of years. The trade off is stability, since a stand slides across the floor under hard punching unless the base is loaded with the full recommended weight in sandbags or plates. People routinely put half the recommended weight on and then complain that the stand walks, which it will.
Free standing bags, meaning the kind that sit on a water or sand filled base with the bag attached directly to it, are a different product again. They need no structure whatsoever, they suit apartments, and they are genuinely useful. What they do not give you is the honest feedback of a hanging bag, because the bag bends away from the punch rather than absorbing it and swinging.
The hardware between the mount and the bag

This is where cheap kits fail, and it is the part people economize on after spending their budget on the bag itself.
The swivel sits between the mount and the chains and lets the bag rotate freely instead of winding the chains into a knot. Without one, the bag twists, the straps wear through at the ring, and the whole assembly squeaks with every punch. Buy one rated well above your bag weight for the same dynamic load reason as everything else here.
Chains usually come as four legs meeting at a single ring. The number stamped into a chain or a clip is the working load limit, which already includes a safety factor, and it is a different and much lower number than the breaking strength quoted in some marketing. If a chain carries no rating at all, replace it rather than trusting it.
Fitting a spring between the mount and the swivel is optional, and I would do it anyway. It absorbs the shock spike that would otherwise go straight into the joist, which protects the mount, the hardware and your shoulders, and it noticeably reduces the metallic rattle that carries through a building far better than the thud of the impact does.
Adding a rated carabiner or a screw gate quick link at the top turns taking the bag down into a ten second job rather than a twenty minute one. Use climbing or rigging hardware rather than a hardware store snap clip, because the cheap ones are not load rated in any meaningful way.
Height, clearance and placement
Set the bag so its center sits at roughly your chest height. That puts the top third at head level and the bottom third at body level, which is the working range you actually want, and it is a compromise most people get wrong by hanging the bag too high and then spending months punching upward with flared elbows.
Leave at least three feet of clear floor on every side. Swinging bags travel further than people expect, and you want room to circle it rather than stand in front of it. Standing in front of a bag and hitting it is the single most common way home training stops resembling boxing.
Avoid hanging it in a doorway, directly under a light fitting, or anywhere the swing arc crosses furniture. If the bag is going in a garage with a room above, check what sits on that floor before you drill, because a bag mounted under a bedroom will announce every session.
Checking it and keeping it safe
Once the bag is up, hang on it with your full body weight before you throw a punch. If anything creaks, shifts, or produces a hairline crack in the paint around the plate, take it down and reconsider the mounting rather than hoping it settles.
After the first week of use, put a spanner back on the lag bolts. Timber compresses slightly under repeated load and bolts commonly need a quarter turn or so at that point, after which they generally stay put. Check them again every few months along with the swivel and the chain ring, since hardware fails at the wear point rather than in the middle.
The warning signs worth knowing are a creak that appears where there was none before, drywall cracking in a radius around the plate, a bolt head that no longer sits flush, and any visible elongation of a chain link or an eye bolt. All four mean stop using it now rather than at the end of the session.
What it costs
Budget somewhere between $40 and $90 for a ceiling plate with lag bolts, a swivel and a spring, depending on quality. Beam clamps run $25 to $60. Wall brackets sit between $50 and $120, and the heavier ones are worth the difference. Stands range from $150 to $400, with the upper end buying you a combination frame that takes a speed bag as well.
Every one of those numbers is smaller than the cost of repairing a ceiling, which is the comparison worth keeping in mind while deciding whether to save fifteen dollars on the mount.
The part that actually determines whether you use it
Even a properly hung bag becomes a coat rack within about six weeks if there is nothing to do on it, and that has nothing to do with the mounting. The reason people stop is that standing in front of a bag with no plan for the next three minutes is boring, and boredom beats good intentions every time.
Heavy Bag Pro calls the combinations out loud while you work, so you are following a session rather than improvising one, and your eyes stay on the bag instead of a screen. Over 1,000 combinations across boxing, kickboxing and Muay Thai. The workouts and the round timer are free on iOS and Android.
Frequently asked questions
Can you hang a heavy bag from drywall?
No, and no anchor changes that. Drywall is a surface material with almost no pull out strength, so every mount has to reach a joist, a beam, or wall studs behind it.
How much weight can a ceiling joist hold?
A 2×8 in sound condition will carry a 100 lb bag comfortably, and a 2×6 will usually manage the same. The number that matters is not the bag weight though, it is the peak load during a hard punch, which runs three to four times higher.
What size lag bolts do I need for a heavy bag?
Three eighths of an inch diameter as a minimum, long enough to get at least two inches of thread into solid timber after passing through the drywall. Always drill pilot holes first.
Do I need a spring for my heavy bag?
Not strictly, but it is one of the cheapest upgrades available. It absorbs impact shock that would otherwise transfer into the joist, and it cuts the chain noise that travels through a building.
How high should a heavy bag hang?
With the center of the bag at your chest height, and about three feet of clear floor on every side.
Can I hang a punching bag in a rented apartment?
Use a heavy bag stand or a free standing bag. Neither needs drilling, neither leaves a mark, and both sidestep whatever your lease says about ceiling fixtures.
How do I know if my heavy bag mount is failing?
New creaking, cracks radiating out from the mounting plate, a lag bolt that no longer sits flush, or any stretching visible in a chain link or eye bolt. Any of those means take it down immediately.